
Best Blush Products for Beginners: How to Choose, Place, and Blend
By Eva Laurent
Blush is the fastest way to look awake. One step, and the whole face looks healthier. But it is also the step beginners get wrong most often — the wrong shade, too much product, or placement that fights the face instead of lifting it. This guide keeps it simple: the types of blush, how to pick a shade, exactly where to put it, and one beginner-friendly product worth knowing.
Cream, liquid, or powder?
Blush comes in three main formulas, and the difference is how they blend. Cream blush melts into skin and looks the most natural, especially on dry or mature skin. Liquid blush is the most pigmented per drop and blends fast — a little goes a long way. Powder blush is the most forgiving to control and suits oily skin, but it can look flat if the skin underneath is dry. For beginners, cream and liquid formulas are the easiest to blend with fingers or a sponge, and they give the dewy, skin-like finish that is popular right now.
How to pick a shade
Match the shade to your skin’s undertone, not to the bottle. Fair skin suits soft pinks and light peaches. Medium skin suits rose and warm mauve. Deep skin suits berry, plum, and rich terracotta. If you are unsure, a rosy pink is the safest first blush — it reads as a natural flush on most skin tones. One rule: test blush on your cheek, not the back of your hand. The hand is a different color and texture, and it will lie to you.
Where to put blush: the placement guide
Placement changes everything. Three placements cover almost every look:
Apples of the cheeks — smile, find the roundest part, and place blush there for a natural, youthful flush. This is the beginner default.
High on the cheekbones — sweep blush along the top of the cheekbones, blending toward the temples, for a lifted look.
A light dusting on the nose — a tiny amount across the bridge of the nose adds a sun-kissed effect. Keep it very light.
Blend upward and outward, never in circles. And start with less than you think you need — you can always add a second dot, but taking blush off means redoing the base underneath.
Featured product: e.l.f. Halo Glow Blush Beauty Wand (Rosé You Slay)
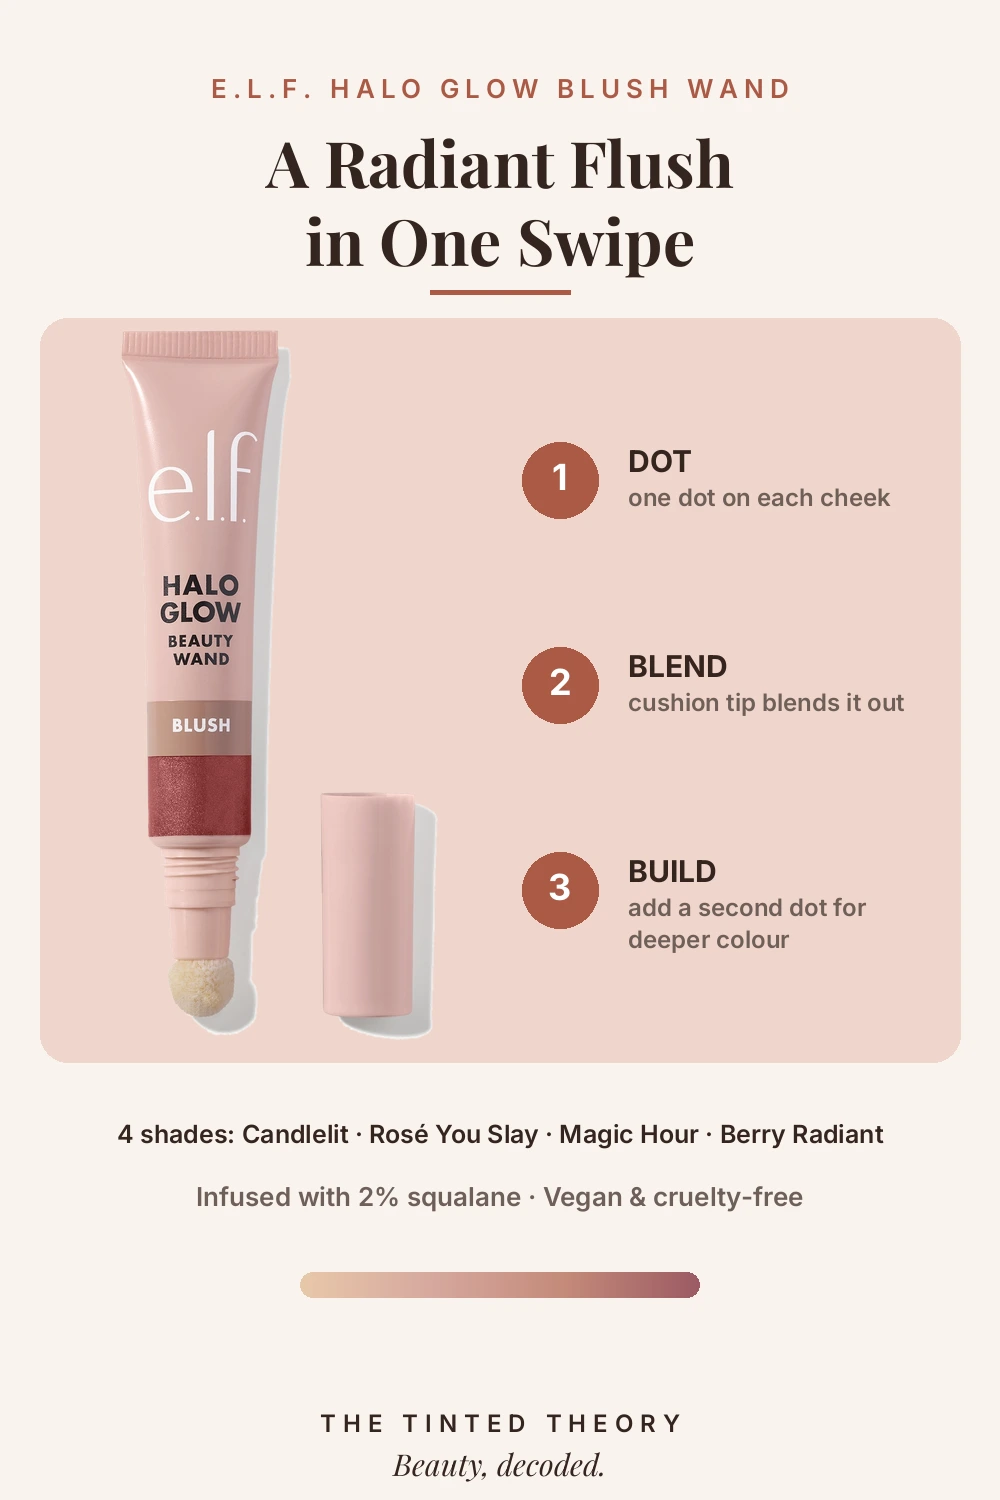
If you want one beginner-friendly blush to start with, the e.l.f. Halo Glow Blush Beauty Wand is a strong pick — and it is the one our readers keep asking about. It is a liquid blush in a wand with a cushion-tip applicator: the soft tip lets you dot the product straight onto the cheek and blend it out without a brush. The finish is radiant and glowy rather than matte, giving cheeks a flushed, lit-from-within look. The formula is infused with 2% squalane, a moisturizing ingredient, and it is vegan and cruelty-free. It comes in four shades — Candlelit, Rosé You Slay, Magic Hour, and Berry Radiant — and the Rosé You Slay shade is a soft rose that suits a wide range of skin tones.
Affiliate link — #ad: View the e.l.f. Halo Glow Blush Beauty Wand on Amazon
How to apply it: dot, blend, build
Dot once on each cheek, blend out with the cushion tip (or a sponge or fingers), and add a second dot only if you want deeper color. One dot is usually enough for a daytime flush.
Who it suits: beginners who want a foolproof application, and anyone who likes a glowy, dewy finish rather than a flat matte cheek. If you prefer powder formulas or a fully matte look, this is not the product for you.
Frequently asked questions
Should beginners choose cream or powder blush? Cream and liquid blush are more forgiving for beginners because they blend with fingers and melt into skin. Powder is easier to over-apply and harder to soften once it is on.
How much blush is too much? If you can see a hard edge, it is too much — or not blended enough. Blend until the edge disappears. A good check: step back from the mirror. If the blush reads as a flush from a normal distance, it is right.
Can I wear blush without foundation? Yes. Blush works beautifully on bare skin or over sunscreen and moisturizer. Place it on the apples of the cheeks and blend well — that is the whole routine.
The bottom line
Blush does not need a complicated routine. Learn your shade, place it on the apples of the cheeks or high on the cheekbones, blend upward, and start light. The e.l.f. Halo Glow Blush Wand makes the application part easy; the placement guide above does the rest.
Affiliate disclosure: This article contains affiliate links, including links marked #ad. If you buy through one, we may earn a commission at no extra cost to you. See our Affiliate Disclosure page for details.
About the author: Eva Laurent is the beauty curator behind The Tinted Theory. She researches every product from its real listing before it appears here.